Class Components
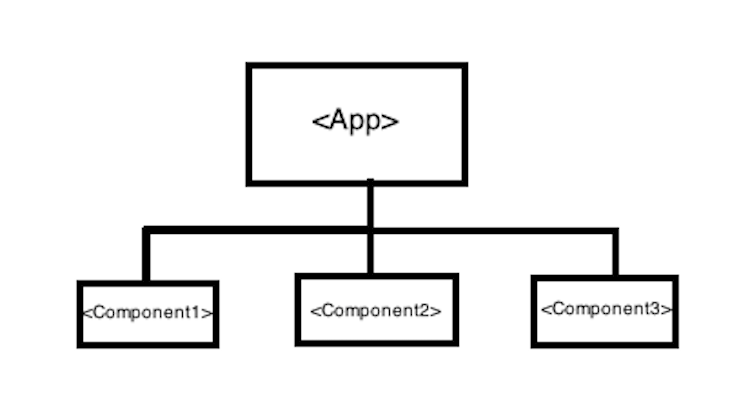
Applications built with React are made up of reusable components. Components serve as the “building blocks” of your application or project. Dividing your application into separate components is a recommended practice when using React. Each component represents a specific part of your UI or functionality. Let’s look at an example of how a simple homepage could be divided into components:
Simple Homepage
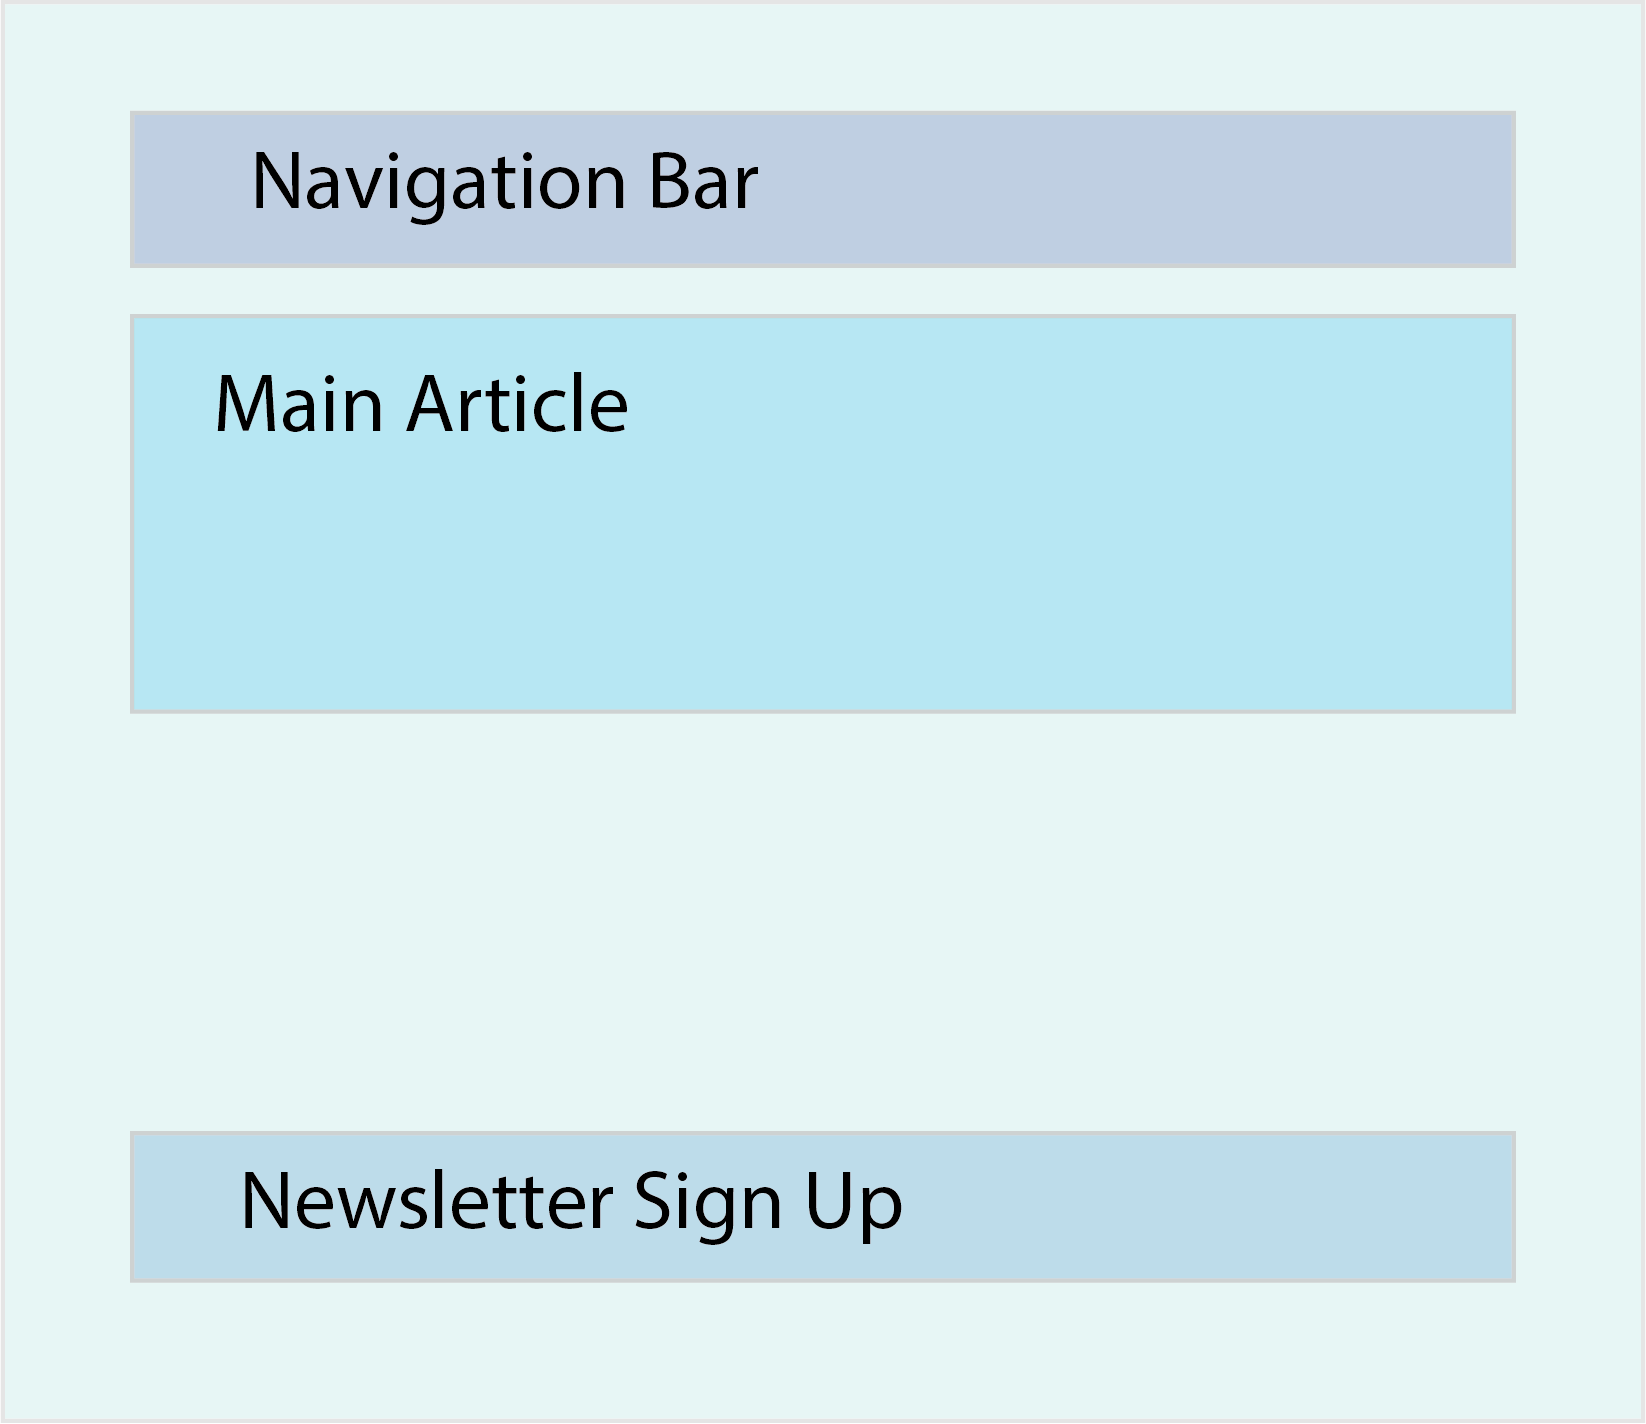
For instance, the components for a simple website could be structured as follows:
- App: Represents the main application and acts as the parent component that contains all other components. It encompasses the entire page.
- Navbar: Represents the navigation bar component.
- MainArticle: Renders the main content of the page.
- NewsletterForm: A component that displays a simple form allowing users to input their email to receive a weekly newsletter.
So the page is made up of components(the navbar, MainArticle and NewsletterForm) that have sub-components(the parts that make up the components).
In React, each component is defined in an ES6 (ECMAScript 2015) module. Components are typically written in separate files and then imported into the parent component. For example:
import ExampleComponent from "./components/ExampleComponent"
In the above code, we import the ExampleComponent from the ./components/ExampleComponent file. The parent component, in this case, would be App.js.
When structuring components, it may take some time to determine the best organization, especially when dealing with concepts like state and props. However, dividing your application into components helps maintain code organization and facilitates tracking the relationships between components.
Here’s an example of a basic component written in React:
import React, { Component } from 'react'

class App extends Component {
    constructor() {
        super()
    }

    // JavaScript functions can be written here

    render() {
        return (
            <div className="App">
                Hello World!
            </div>
        )
    }
}

export default App
Let’s break down the code step by step:
- Import statement: Imports the
Reactobject andComponentclass from the React library. This allows us to create a class component. The use of curly brackets indicates the specific elements being imported. - Class component declaration: We declare the
Appclass component by extending theComponentclass from React. This step provides the necessary methods and properties for a React component(This component class itself is not a component but a factory that is used to create components.). - Constructor: The
constructorfunction initializes the component. In this example, it is empty, but it becomes essential when dealing with concepts like inheritance and state (You will usually see developers passing props as an argument to the constructor and also to the super() call, which must be called in any React constructor). - Render function: The
renderfunction is a required method in React class components. It returns JSX (JavaScript XML), which resembles HTML but is actually transpiled into JavaScript. JSX allows combining JavaScript and HTML-like syntax.- One important thing to note about JSX is that it enforces some differences compared to regular HTML due to its integration with JavaScript. For example:
- HTML attribute naming: In JSX, you can’t use certain JavaScript reserved words as HTML attributes directly. For instance:
- Instead of using
classas an attribute, you need to useclassName. - Instead of
onchange, you writeonChange. - Instead of
for, you must usehtmlFor.
- Instead of using
- Attribute naming convention: All attributes in JSX are written in camelCase. This means that multi-word attribute names are converted to camelCase. For example:
classbecomesclassName.onchangebecomesonChange.forbecomeshtmlFor.
- HTML attribute naming: In JSX, you can’t use certain JavaScript reserved words as HTML attributes directly. For instance:
- One important thing to note about JSX is that it enforces some differences compared to regular HTML due to its integration with JavaScript. For example:
- Export: To reuse the
Appcomponent in other files, we export it as the default export usingexport default App. This allows other modules to import and use the component.
Component as a function (like a factory function):
import React from 'react';

function App() {
  return <div className="App">Hello World!</div>;
}

// OR (arrow-function syntax)

const App = () => {
  return <div className="App">Hello World!</div>;
};

// OR (implicit return)

const App = () => <div className="App">Hello World!</div>;

export default App;
The differences between functional and class components:
- Functional components are defined as functions and do not require importing and extending the
Componentclass. - They don’t have a constructor and render function. Instead, the
returnstatement is placed directly in the function body. - Functional components are more modern and often preferred for simpler components.
Read more about the differences between functional and class components.
Create-react-app (Deprecated)
Developers at Facebook have created a tool called create-react-app, which automates the setup and configuration of a complete React application. By running a single command, create-react-app handles all the necessary steps to get your project up and running quickly.
Create React App is a toolchain(a set of distinct software development tools linked by specific stages). It is specifically recommended by the React community for building single-page applications (SPAs) the contents on the page are rewritten from the server, and the content changes without a browser refresh.
To see the concepts in action, run the following command:
npx create-react-app my-first-react-app
This command will set up a new React application named “my-first-react-app.” After the setup is complete, navigate to the project directory by running cd my-first-react-app, and open it in your preferred text editor. You can also view the project in the browser by running npm start in the terminal.
Two important files that create-react-app includes are index.js and App.js. By default, index.js serves as the entry point of your application. Take a look at the code in index.js:
const root = ReactDOM.createRoot(document.getElementById('root'));
root.render(
  <React.StrictMode>
    <App />
  </React.StrictMode>
);
This code tells React to render the App component into the DOM, specifically into the element with the id “root.” In your project, you’ll find a root div in the index.html file located in the public directory. If you decide to name your main application component something other than App.js, be sure to update its name in index.js accordingly.
How create-react-app works: article, video. Explains the file system created by create-react-app.
Explore your application’s performance by learning about ReportWebVitals here.
React Developer Tools
React Developer Tools is a browser extension that enhances the browser’s developer tools to help you inspect React components that compose your application. It provides features to inspect and modify the React component tree, view props, state, and hooks for each component, and perform basic debugging tasks. Install React Developer Tools as a Chrome extension here.
For instructions on installing React Developer Tools and basic debugging techniques, refer to this article.
React Learning Resources
-
Start with the Quick Start page in the React documentation. It provides a short introductory tour of React, introducing concepts like components, props, and state.
-
Videos:
Functional Components
Functional components are essentially JavaScript functions that return JSX. Here’s an example:
function Greeting() {
  return <h1>"I swear by my pretty floral bonnet, I will end you."</h1>;
}
- Create a new file named
Greeting.jsxin your project. - Write your own functional component in the file. Ensure the function name is capitalized.
- Return your desired JSX content within the function.
Remember that components should be capitalized to work correctly.
HTML escape code
In the example above, " is an escape code used to render a double quote ("). To avoid errors, use escape codes for special characters. You can also use tools like LambdaTest’s HTML Escape Tool or refer to w3.org for more escape codes.
Where do components live?
Components are often stored in dedicated files, making them independent. To use functionality from other components and share components, we use importing and exporting.
Example of exporting a component:
function Greeting() {
  return <h1>"I swear by my pretty floral bonnet, I will end you."</h1>;
}

export default Greeting;
To import and use the component:
import React from 'react';
import ReactDOM from 'react-dom';
import Greeting from './Greeting'; // Make sure to provide the correct path
import './index.css';

ReactDOM.createRoot(document.getElementById('root')).render(
  <React.StrictMode>
    <Greeting />
  </React.StrictMode>
);
By following these steps, you’ve successfully imported and used a custom-made component in your project.
Advanced: Named exports
While components are often exported as defaults, you can also use named exports. Refer to MDN documentation about export statements for more details on using named exports.
Remember, components enhance modularity and reusability in your React applications.